Using PinPoint
Full Video Walkthrough
PinPoint Guide
PinPoint can be used to record points of interest from right within the panoramic photo pane. While placing a pinpoint, data can be added such as the marker type and general comments. Once pinpoints are placed, the pinned locations along with their associated data can be exported to be used in external softwares or just to externally store these points of interest. Some specific capabilities include asset inventories, inspection points of interest and mapping features.

Placing A PinPoint
For a rundown on each of the buttons that the PinPoint dropdown menu has, visit the PinPoint Feature Reference Page
Open the PinPoint dropdown menu.
Select the PinPoint placement tool.
Place a PinPoint in the panoramic photo pane using the left mouse button (Note: You are able to navigate in the photo pane while the PinPoint tool is active)
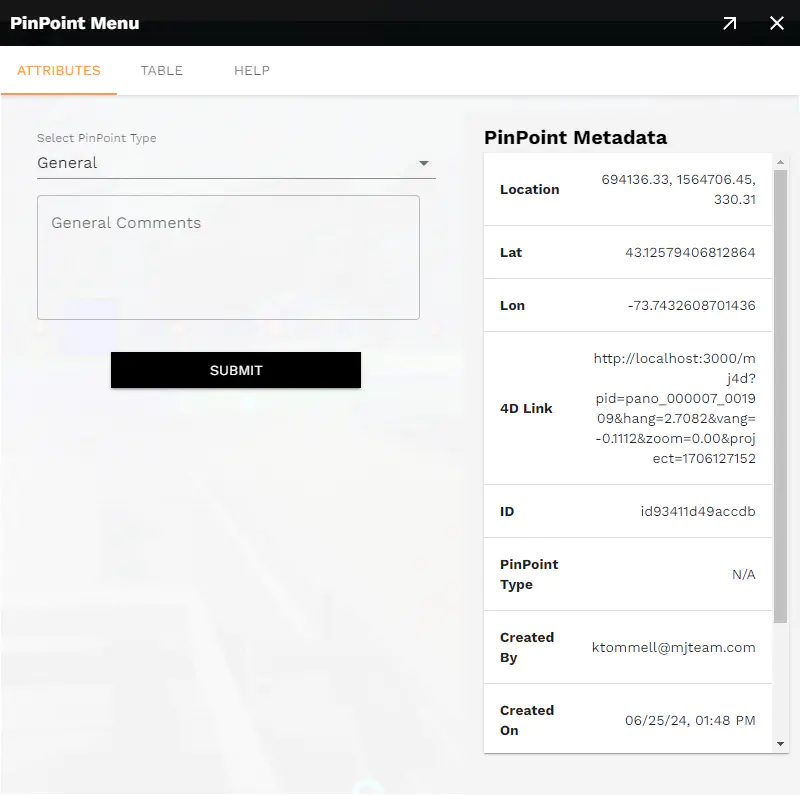
Once a pinpoint is placed, data about the pinned location can be added on in the Attributes tab of the PinPoint Menu. Here, select the pinpoint type and add any relevant additional comments. Newly placed pinpoints will default to General type.
Submit this form to save the pinpoint data. To exit pinpoint placing mode, right-click anywhere in the photo pane.
Editing A PinPoint
Existing pinpoints can be edited in a variety of ways including editing associated data, moving the pinpoint, and deleting the pinpoint.
Editing PinPoint Data
Click on a pinpoint marker.
Once selected, the PinPoint Menu will appear on the Attributes tab displaying information about the selected pinpoint.
Click the Edit This Pin Data button at the top of the PinPoint Menu window and make any desired changes.
Note: The Marker Type cannot be edited after the initial submittal of the form, the type can only be set for newly placed pinpoints.
Moving A PinPoint
To move an existing pinpoint right-click on a point and click Unlock from the popup:

When unlock is clicked, the intensity imagery is overlayed on the panoramic photo and the pinpoint is attached to the cursor. To re-place the point, click a new pinpoint location. All previously entered data persists with the pinpoint in its new location.
Deleting A PinPoint
There are a couple ways to delete a pinpoint:
Use the Erase tool from the PinPoint dropdown menu.
In the panoramic photo pane, right-click an existing point and click Delete from the popup.
The pinpoint and all associated data are immediately deleted and cannot be recovered using either of these methods.
PinPoint Menu: Window Functionalities
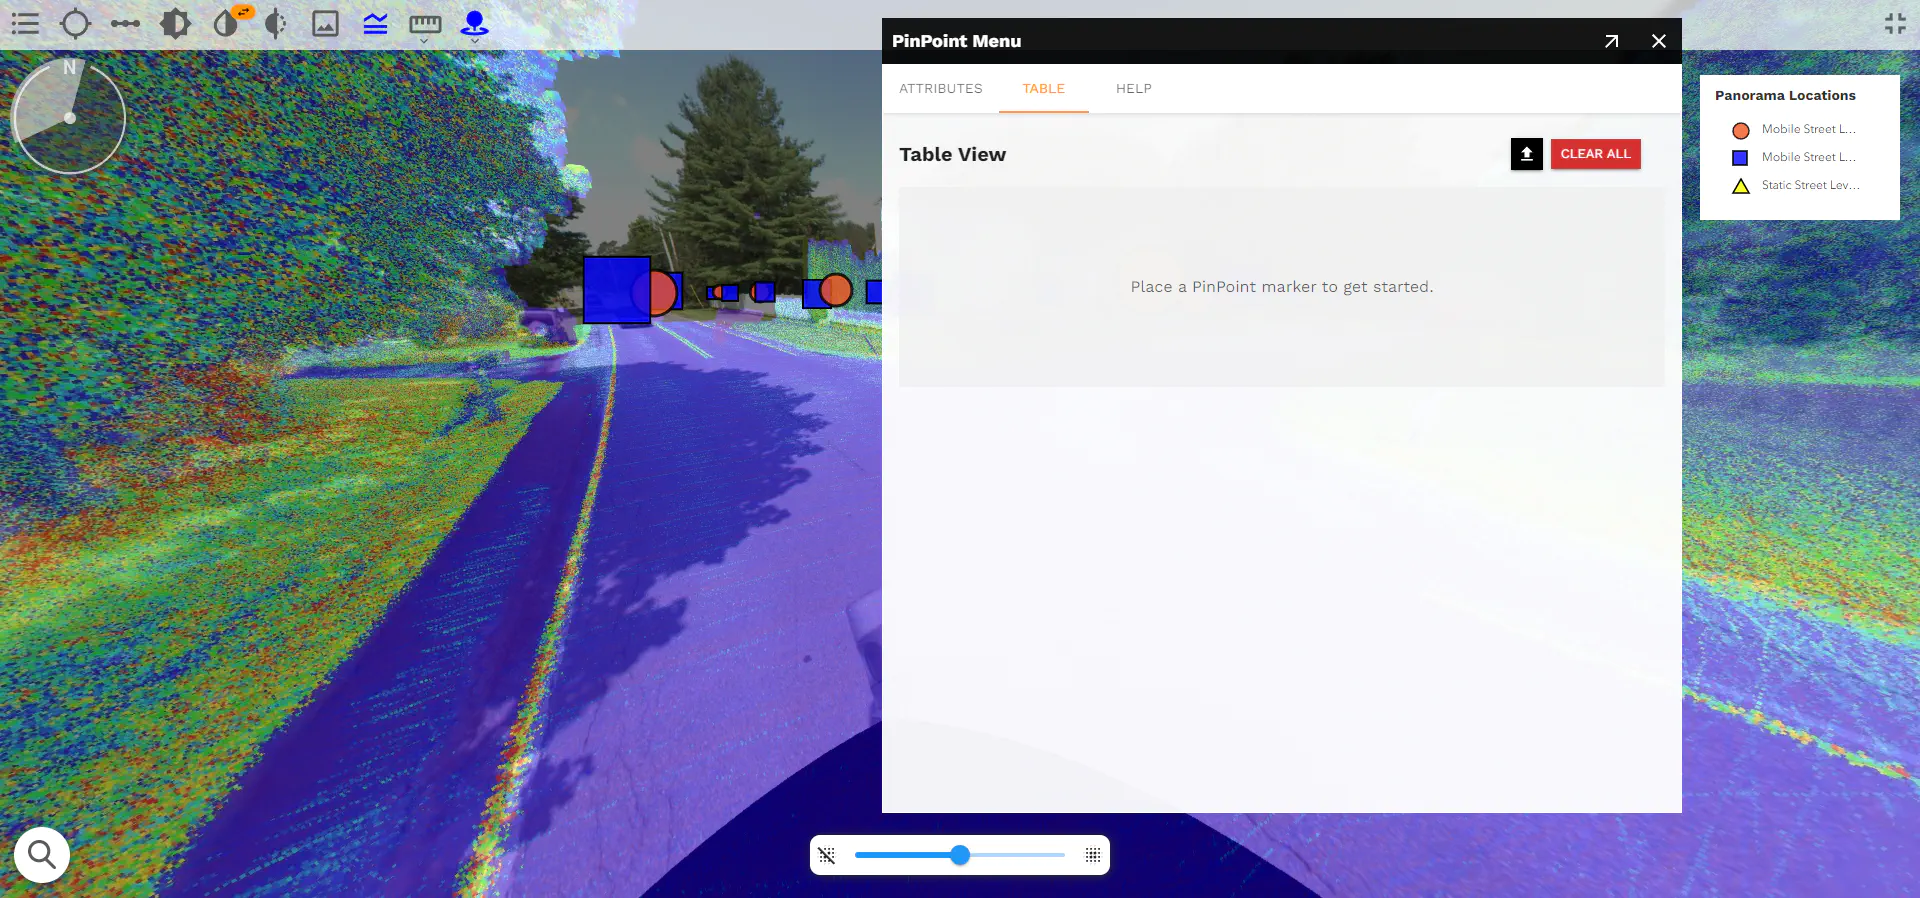
The PinPoint Menu is by default an internal window within the MJ4D webpage but has many functionalities:
The window can be dragged by clicking and dragging the top black bar of the window.
To resize the PinPoint Menu window, click and drag any corner or edge to expand or shrink the window size.
Close the window by clicking the icon in the top right.
Open the menu as an external popout window by selecting the arrow in the top right of the PinPoint Menu.
- Important: Disable the browser’s popup blocker when setting the window mode to external.
PinPoint Menu: Attributes Tab
The Attributes tab stores all information associated with a pinpoint. When a new point is placed, the following populates the tab:

The PinPoint type and General Comments sections are to be filled out, and the PinPoint Metadata is calculated when the pinpoint is placed. This metadata includes data on the MJ4D user to place/edit the point, location information, the MJ4D link, pinpoint ID and type.
Note: Pinpoint metadata cannot be manually edited, but when a pinpoint is updated or moved the metadata and user placement data updates automatically.
PinPoint Menu: Table Tab
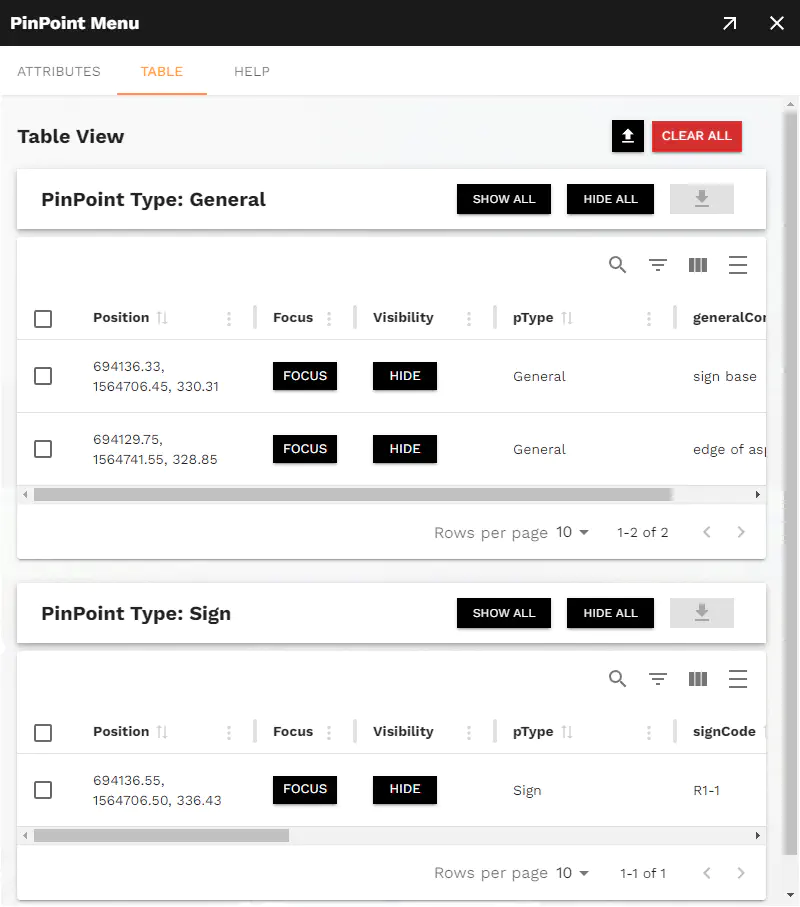
The Table tab displays all placed pinpoints and associated data in tables based on point type. Each Point Type has its own individual table in the Table tab, and each table has many functionalities.

Each table has identical funcionalities, but each function applies only to the specific table (not all pinpoints). Table-specific buttons include: Show All (Show Selected), Hide All (Hide Selected) and Download Selected Items.
Show All/Show Selected shows pinpoints if they are hidden. If any pinpoint or subset of pinpoints are selected with the checkboxes on the left side of the table, the Show Selected Items button applies only to those with blue checkboxes.
Hide All/Hide Selected hides pinpoints if they are visible. If any pinpoint or subset of pinpoints are selected with the checkboxes on the left side of the table, the Hide Selected Items button applies only to those with blue checkboxes.
Download Selected Items allows for a JSON or CSV file of all selected pinpoints to be downloaded. Note that only selected pinpoints will be dowloaded. Once the pinpoints are selected and the button is clicked, add a filename prefix and select the type of file for the export. The exported points will download directly to your computer once the Download As A JSON/CSV button is clicked.
Within the table, each placed pinpoint represents a row with point-specific data filling the columns. Each data field represents specific pinpoint information. General pinpoints have data for each of the following fields:

Position: The XYZ coordinates of the placed pinpoint in the state plane zone that corresponds to the location of the MJ4D project.
Focus: A button for each pinpoint which centers the point in the panoramic photo viewer.
Visibility: A button for each pinpoint which either hides the pinpoint visibility in the panoramic photo viewer or shows the point.
pType: The type of each pinpoint (either General, NYS DOT, or Unknown).
generalComments: The point-specific comments added to each pinpoint.
Within the table, there are a variety of ways to search for pinpoints, choose which data to show and to edit the layout.
Show/Hide Search toggles on and off the table’s search bar. When toggled on, search for pinpoints based on any of the fields using the search bar.
Show/Hide Filters toggles the visibility of search bars for each relevant field. When toggled on, each field besides Focus and Visibility show a searchbar right below the field title. Type any keywords or any information held within the field to find desired pinpoints.
Show/Hide Columns toggles the visibility of each column in the table. With the exception of Position which is always shown, each field can be either shown or hidden in the table view using this tool.
Toggle Density changes the height of each row in the table. This is good for showing a lot of pinpoints in a small area, showing a lot of data for each pinpoint, or being somewhere right in the middle.
There are two buttons that apply to all pinpoints regardless of the point type: Upload Items and Clear All.
Clear All will delete all existing pinpoints. Once clicking the button, there is a confirmation of the deletion, but once the confirmation is clicked all points are deleted and cannot be recovered.
Upload Items allows previously placed and exported pinpoints to be imported into the current MJ4D project. The uploaded items must be from a JSON file in the same format as when pinpoints are exported from a project to a JSON file. Each pinpoint value is unique so any changes to existing uploaded data will need to be re-downloaded to track the changes made during your session.