Appia® Integration
Visualize, track and manage your Appia® project activity right in MJ4D.
Use the PinPoint feature to create new Appia® Item Postings.
Getting Started - Adding Your PAT
To use this functionality you must first have access to an Appia® Personal Access Token (PAT). For more information on how to create or obtain a PAT you can reference Appia® API documentation.
Open the PinPoint dropdown menu.
Select the “Appia®” tab at the top of the PinPoint Menu.
Select the “Connect to Appia®” button and select “Add Key” to display the Key Submission menu:
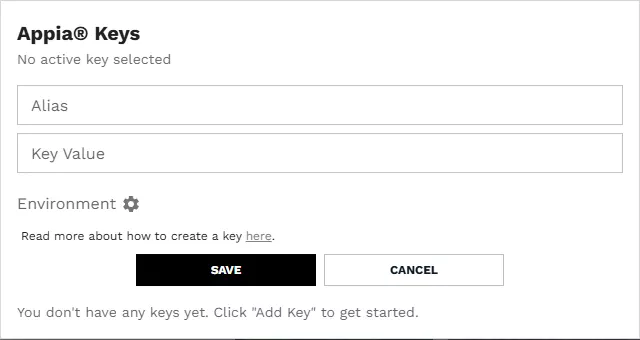
Provide an Alias that describes your key. In the “Key Value” field enter the PAT itself. Click the “Save” button to store this key.
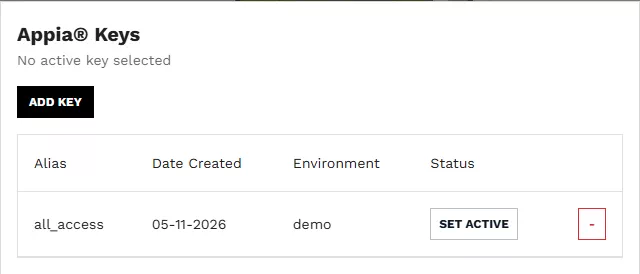
After submitting your key click the key icon: to be shown a list of all the keys you submitted. Find the key you want to use and select the “Set Active” button to set this as your currently active key:
- Once you’ve entered your key and set it as active you have to select your project by clicking the “Set Project” button:
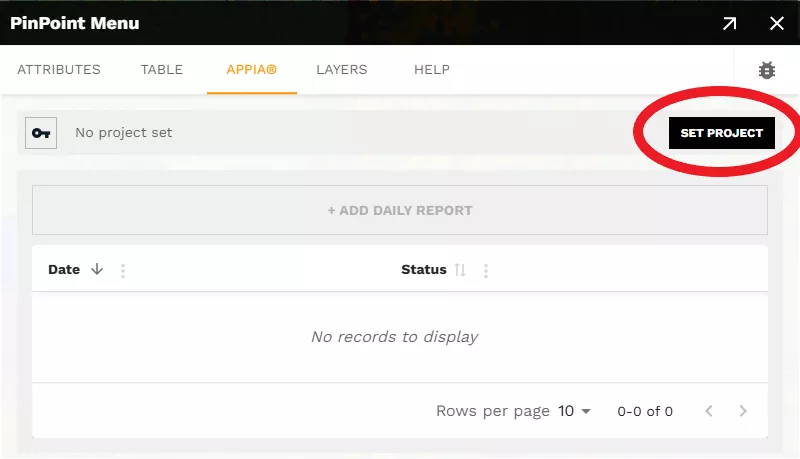
Projects must be in the “Under Construction” stage in order to set it.
Navigating Daily Reports
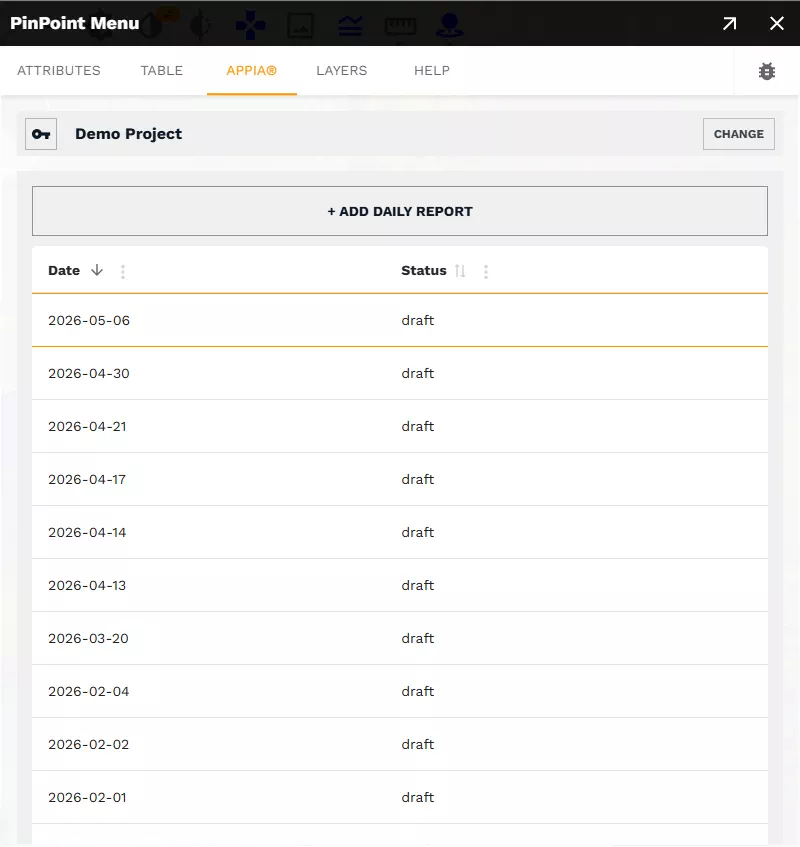
Once a project is selected all Daily Reports for your project will show in the Appia® tab. To reveal more information about the report or see the Item Postings for each report you can click on an entry.
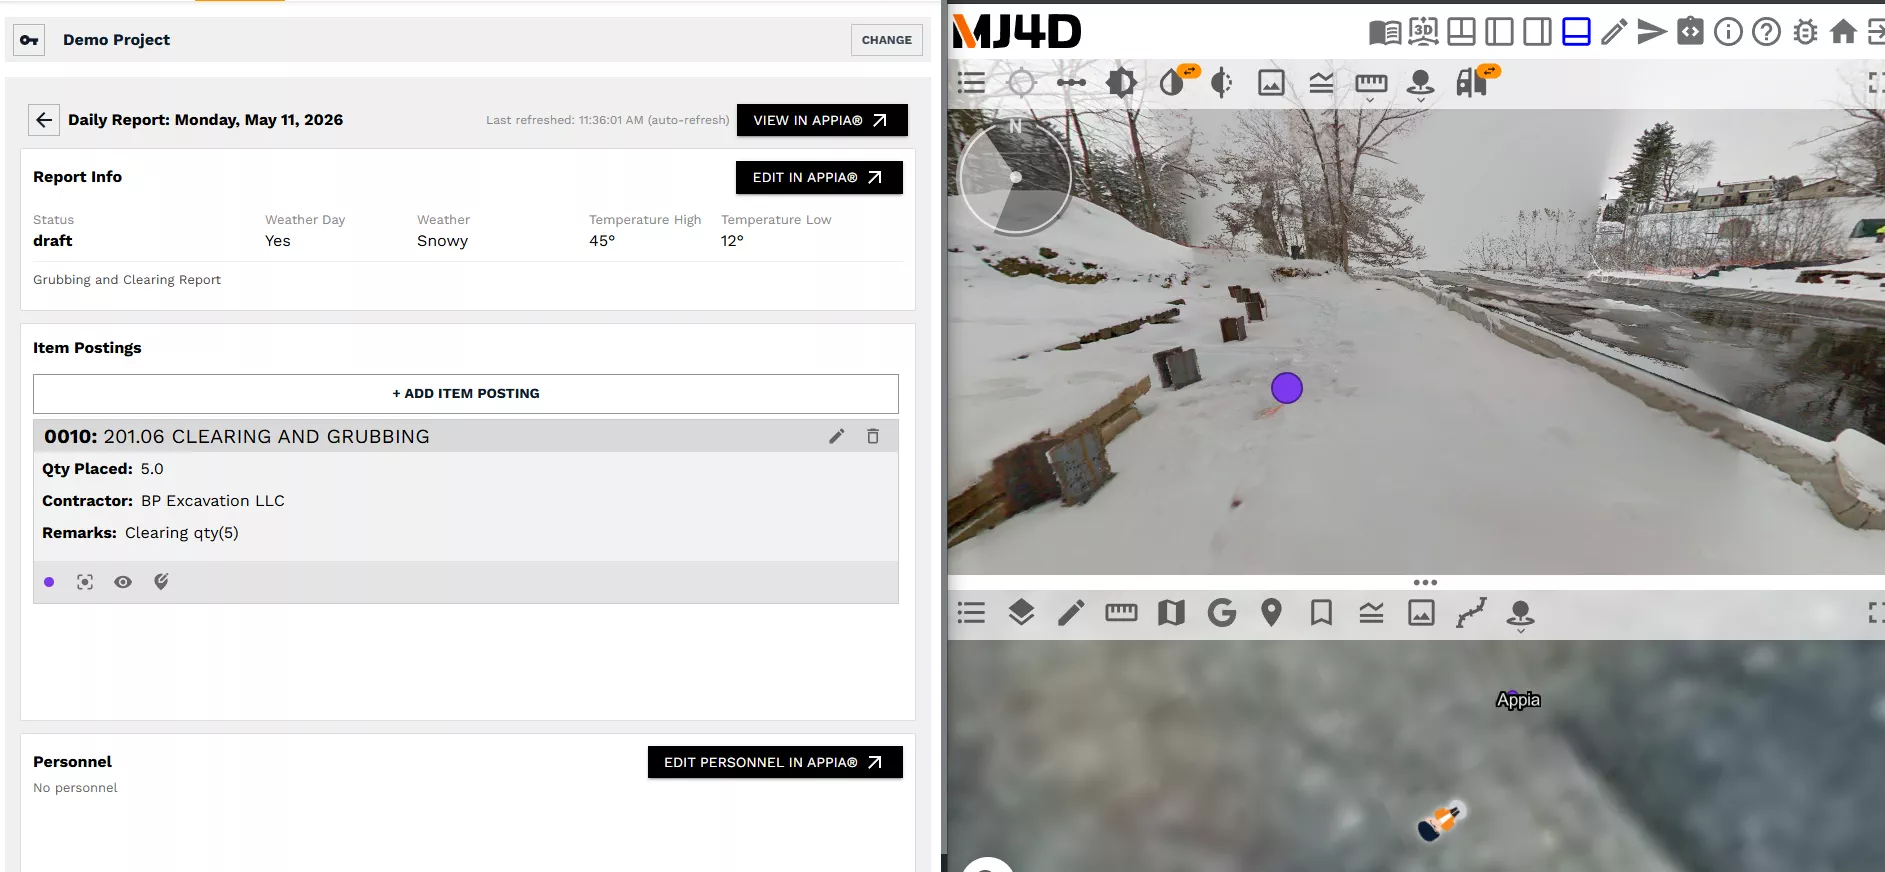
Selecting a Daily Report will bring you to a Daily Report summary menu. Additional information about the report including the report summary, Personnel and Equipment for that report in this menu.
When you select a Daily Report, all the Item Postings for that report will become visible in all three MJ4D viewer panes indicated by a purple icon.
Adding Daily Reports
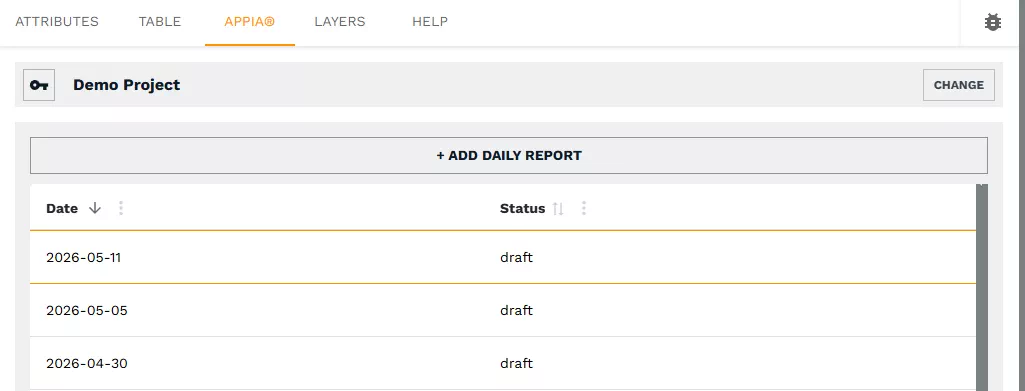
- Select the “Add Daily Report” button at the top of the list of Daily Reports to show the form to add a new Report:
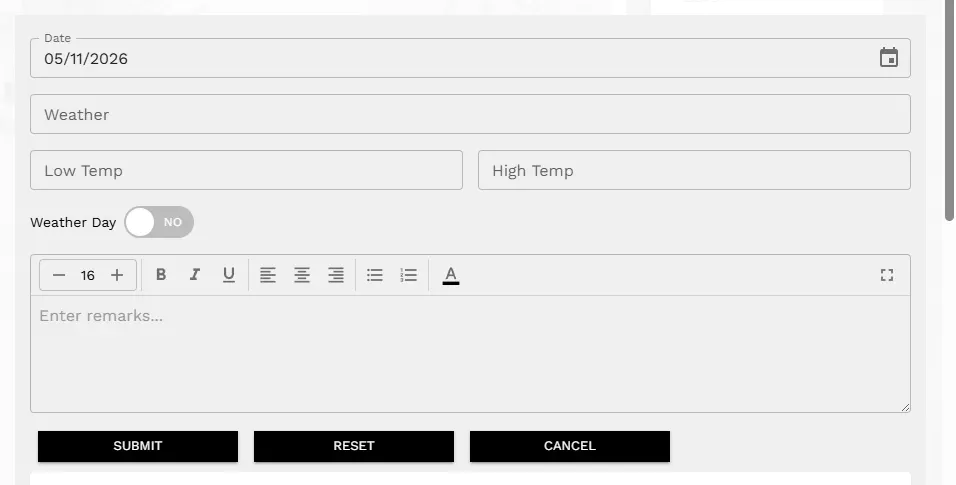
The fields for a Daily Report are:
- Date of the report
- Weather
- Low/High Temperature
- Weather Day (yes/no)
- Remarks field for entering any additional information about the report.
Once you submit a daily report it will be created and immediately available in the Appia® portal. To edit the Daily Report summary you must open the report on the Appia® portal.
Adding Item Postings
- In the Report summary menu, select the “Add Item Posting” button.
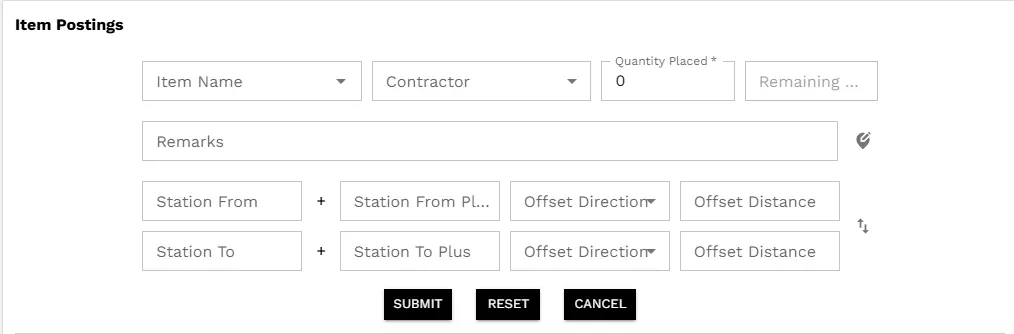
The form fields include:
- The item name (displaying a dropdown of all item names associated with the project)
- The contractor (a dropdown of all contractors associated with the project)
- A numeric Quantity Placed field
- Remarks (a text field for entering any relevant info on the item posting)
- An option to place a new Appia® point or connect an existing PinPoint Line or Point
- Station information fields are pre-filled based on the current active alignment or you can alternatively manually enter station information for the Item Posting.
Placing a New Appia® Item Posting
- When adding a new Item Posting you can associate a PinPoint with the Item Posting by selecting the “feature action” icon next to the “remarks tab”
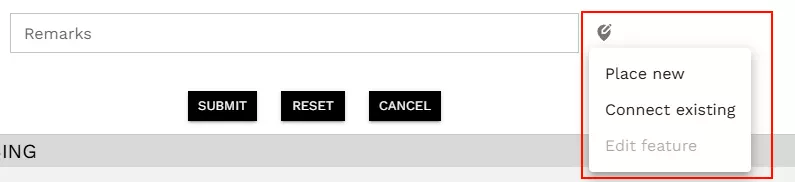
- By selecting “Place new” you can place a Point or Line Geometry within the Pano Viewer pane to drop a point for the Item Posting.
Linking an Existing PinPoint to an Appia® Item Posting
- To connect an already-placed feature to an Appia® item posting, open the Appia Item Posting form, then right-click the placed feature in the map or photosphere and choose “Send to Appia” from the menu.
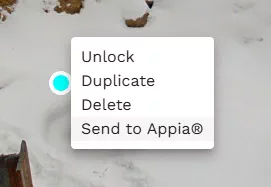
- Once you click “Send to Appia” all the geospatial information and geometry will be associated with the linked Item Posting.
Viewing Item Postings
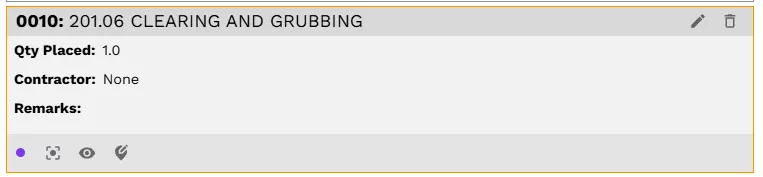
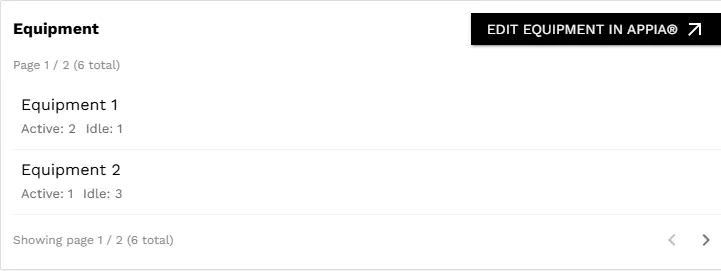
Equipment Section
Each Item Posting has an Equipment section that shows all the equipment listed for that specific item. To edit the equipment you must do so through the Appia® portal.
Personnel Section
Similar to the Equipment Section, there is a Personnel section that must be edited on the Appia® portal. Click the “Edit Personnel In Appia®” button to be redirected directly to the page to make edits to the personnel.

Edit Item Postings
There are two ways you can update Item Postings that have already been submitted.
You can select the pencil icon next to each item posting:
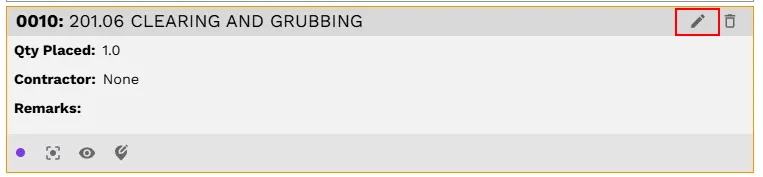
Selecting this icon will open an edit menu where you can change information on the item posting
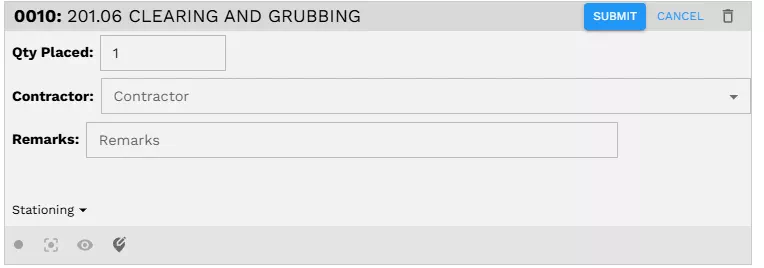
Here you can update form fields for the Item. For items that don’t currently have geometry associated with it you can place a line or point for the Item Posting by selecting the “edit feature” icon and selecting “Place New”.
Editing a Placed Feature
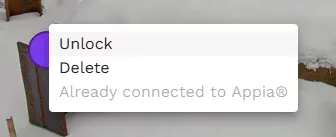
- To edit a placed feature, right-click the point (or the node of a line) in the map or Pano Viewer and choose the “Unlock” option in the menu. This will allow you to reposition the feature.
Deleting Item Postings
To delete a placed feature line or point you can right-click on the feature in the Pano Viewer.
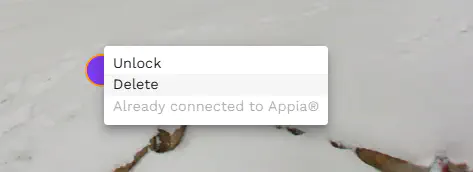
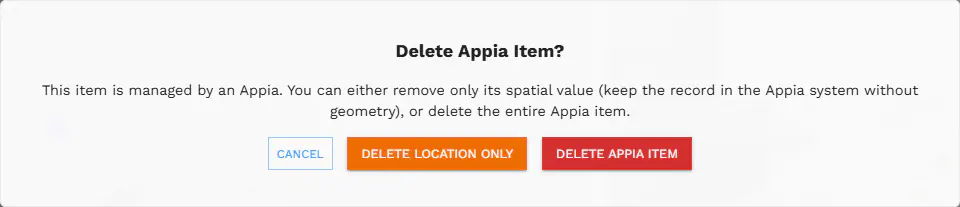
After selecting delete item you will be shown the option to delete the entire Appia® item posting or just the location itself.