Quick Start 🚀
Follow this guide to get started with MJ4D.
What is MJ4D?
MJ4D is a web app developed by MJ Engineering, Architecture, Landscape Architecture, and Land Surveying, P.C. (MJ), designed to provide users with access to a digital twin of real-world locations.
MJ utilizes the latest reality capture technologies to bring the real world into MJ4D. Places can range in size from a single building to the street network of an entire city.
MJ4D has been designed with a focus on infrastructure and the built environment to meet the needs of professionals in the AEC industry. Intuitive navigation, a full suite of features, and the ability to integrate with other software makes MJ4D both a robust standalone tool and an invaluable component of AEC workflows. Learn more at https://mj4d.mjteam.com.
Getting Started
MJ4D is free for anyone to try and getting started is as easy as visiting a link with your web browser. MJ4D runs directly in modern web browsers and does not require any installation. We recommend using Google Chrome or Microsoft Edge.
To get started, visit https://mj4d.mjteam.com and click the Sign Up button. This will take you to https://mj4d.com to create your free account. Input your information, read and agree to our terms of use, verify your email and you are all set to begin exploring in MJ4D.
Desktop and Mobile Versions
Accessing MJ4D from a mobile device will automatically switch the app to a simplified version optimized for mobile. Use MJ4D on desktop to enable the full user interface described in this guide.
Basic Navigation - MJ4D
User Interface
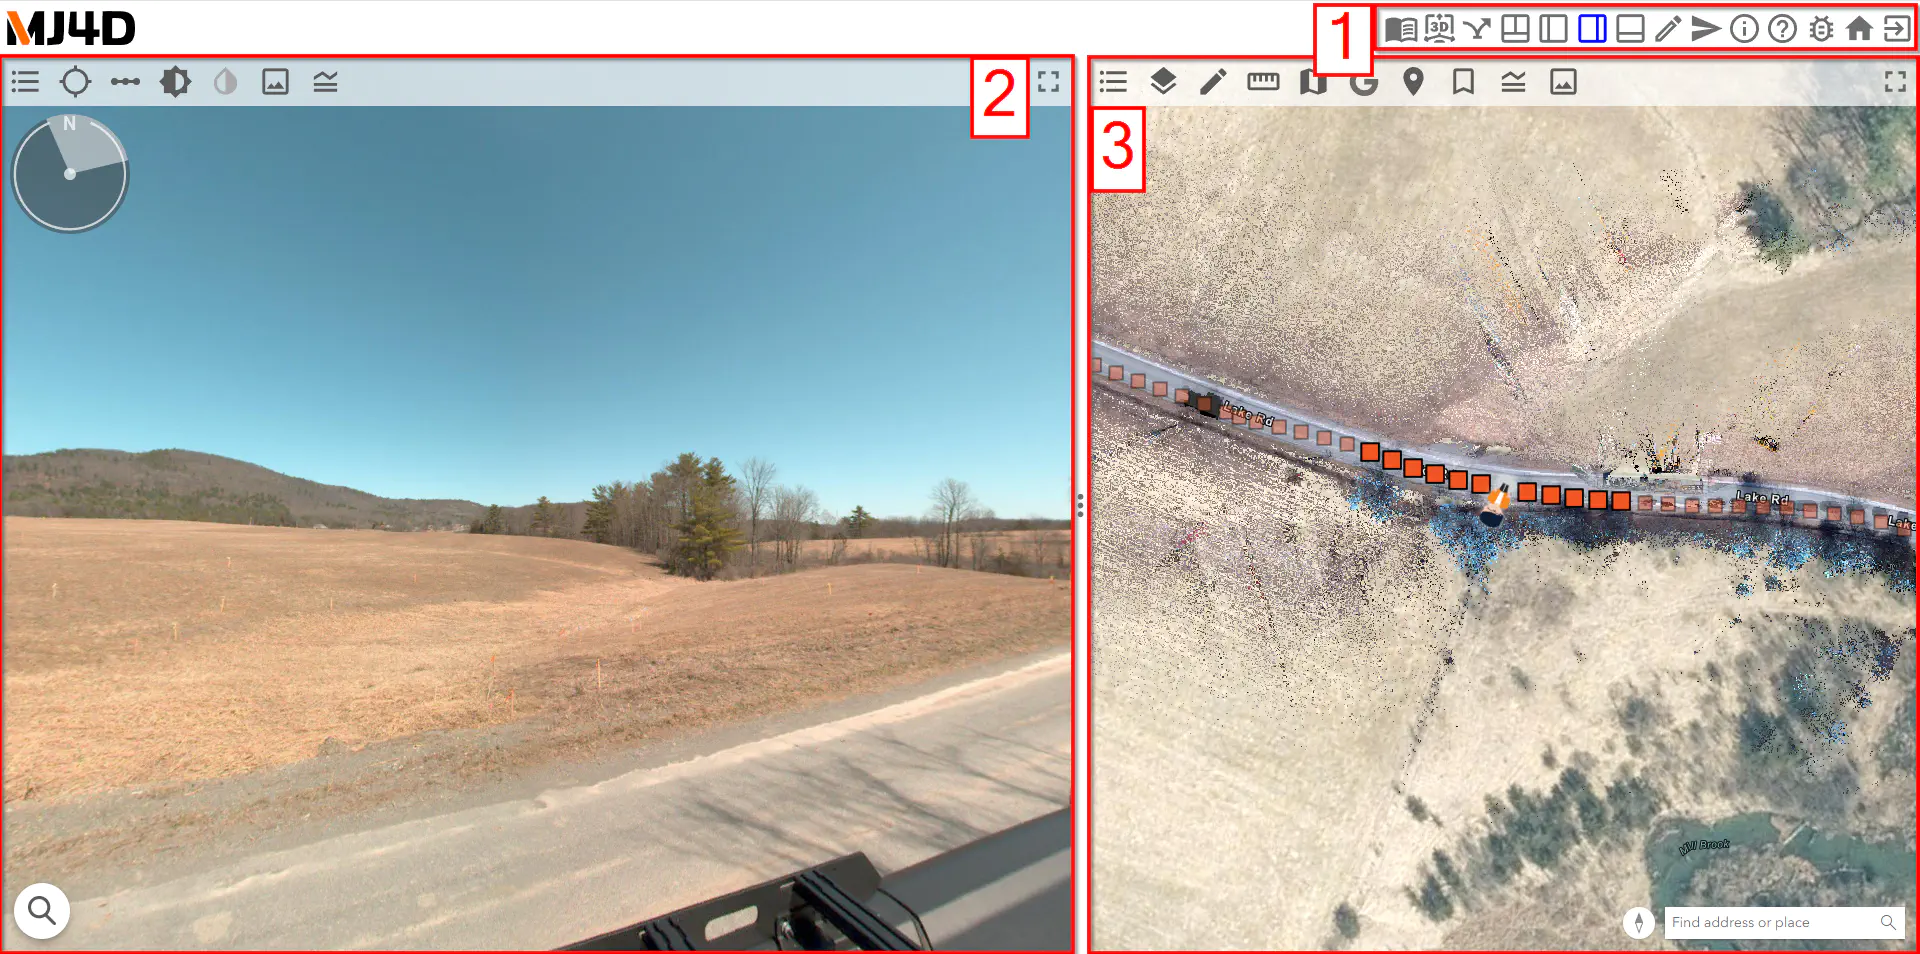
The MJ4D interface is comprised of four main components:
Navigation Bar
Panoramic Photo Pane
Map Pane
Pointcloud Pane
When first opening MJ4D only the Navigation Bar [1], Panoramic Photo Pane [2], and Map Pane [3] will be visible.
To view all the main components at once click the three pane view button in the Navigation Bar [1].
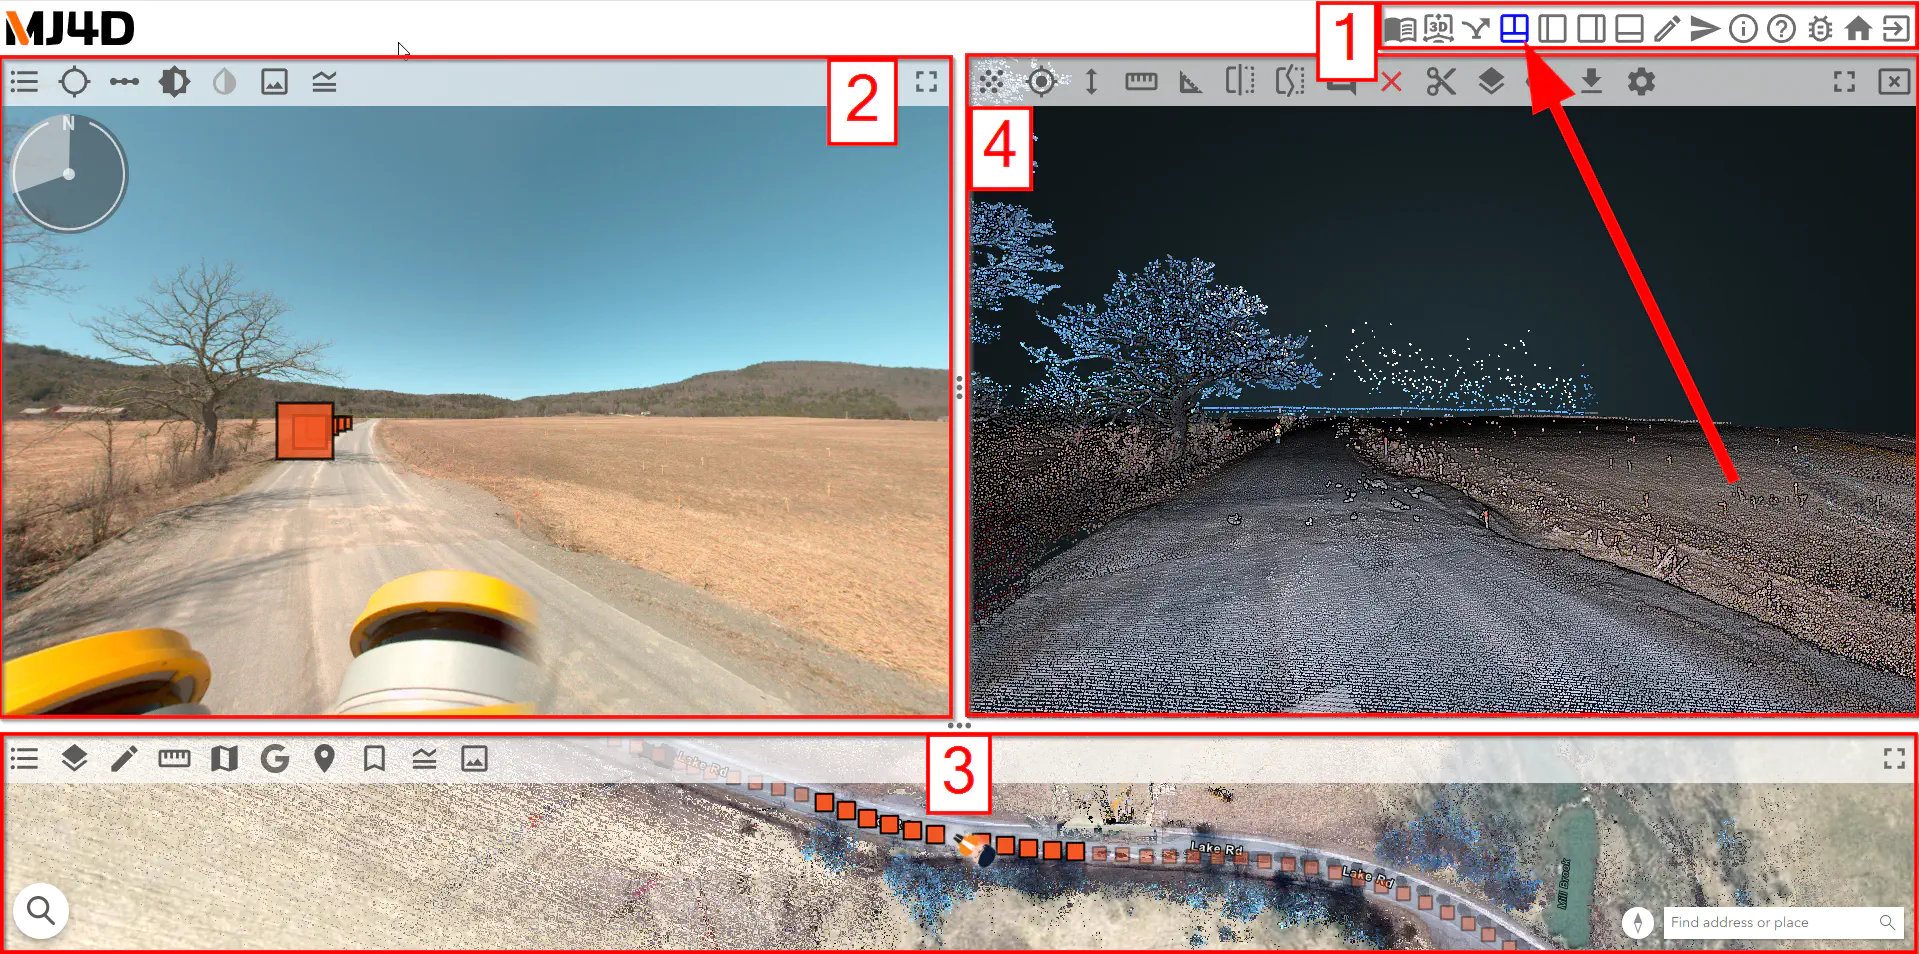
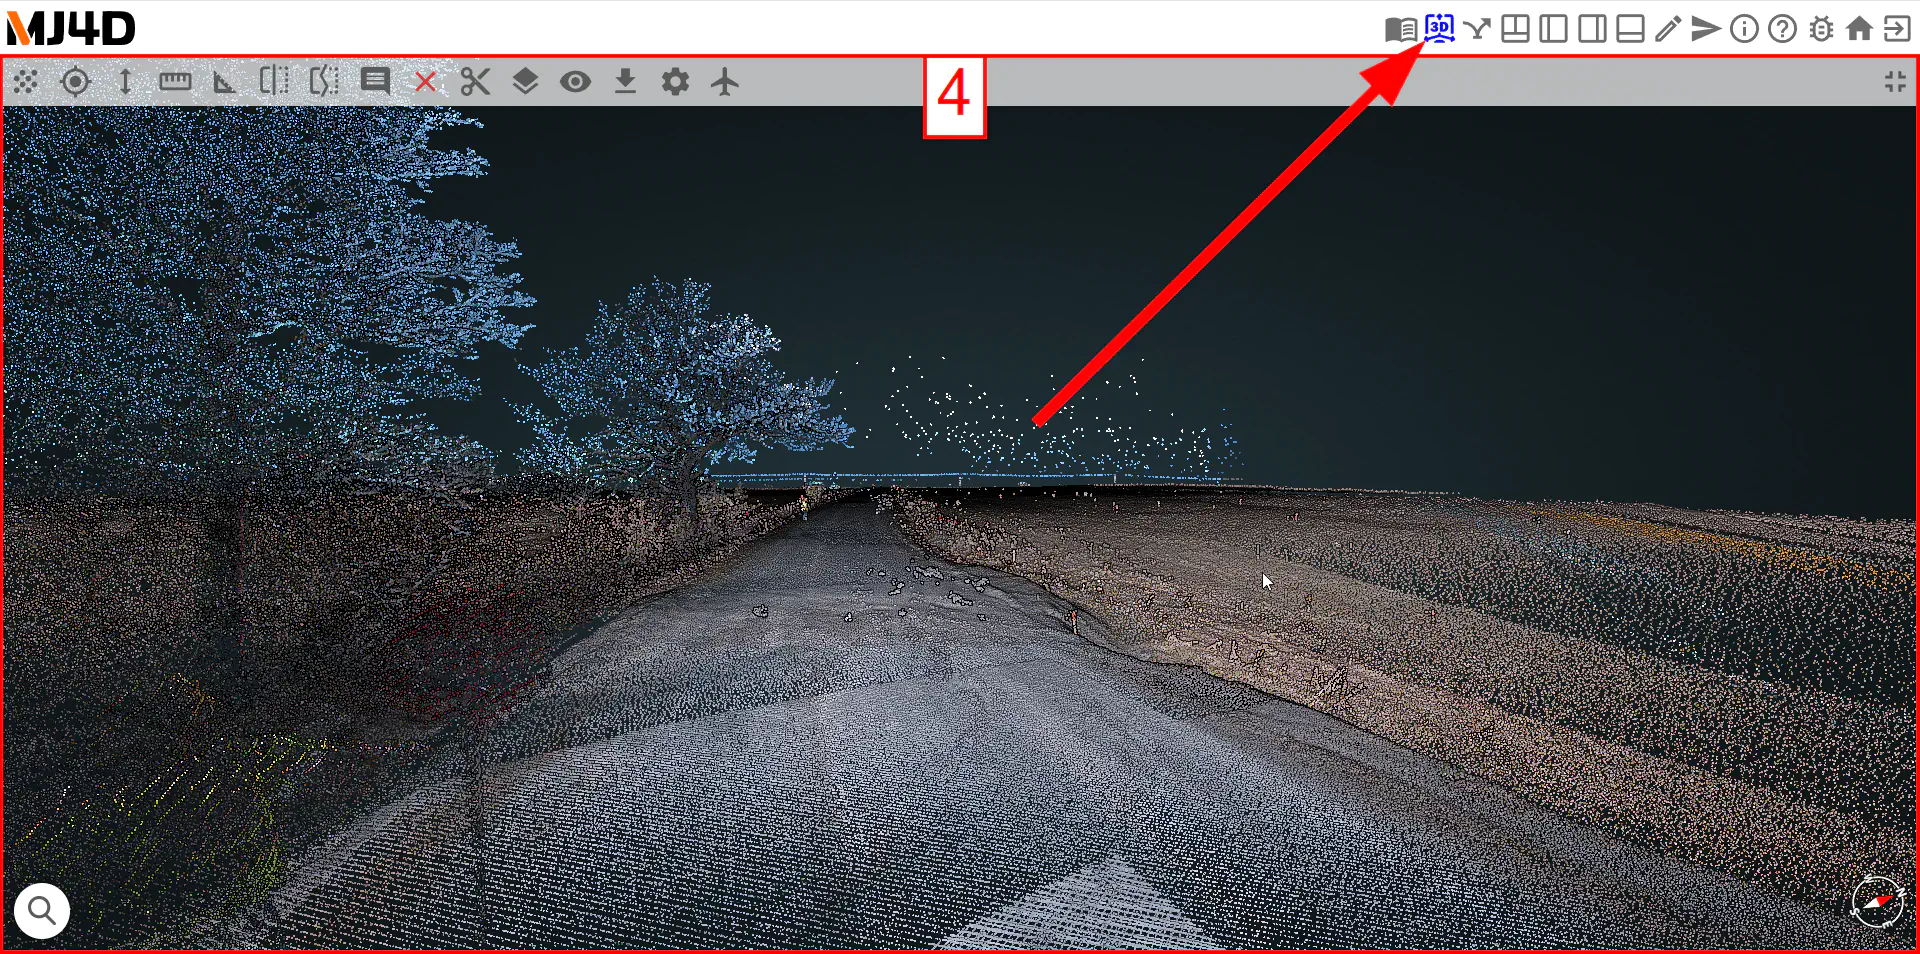
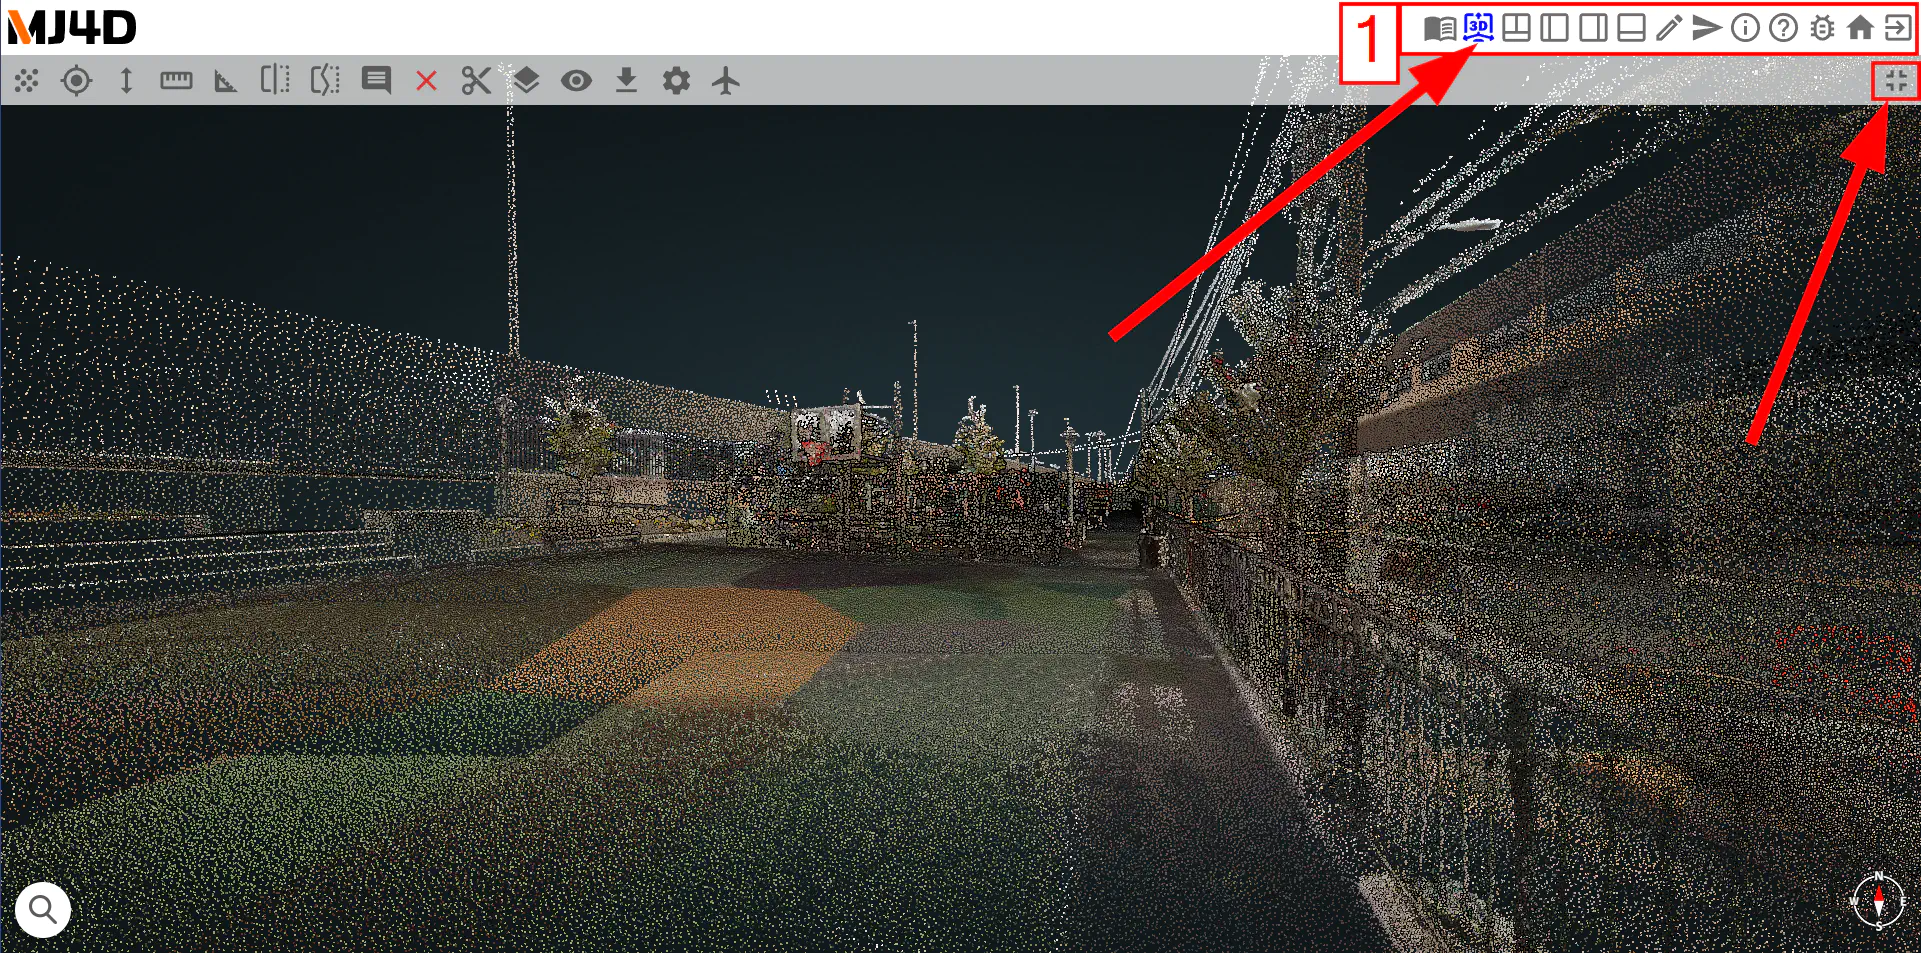
To open any pane to full screen, click the fullscreen button , and to revert back to the previous view click the exit fullscreen button . Additionally, to open the Pointcloud Pane full screen click the 3D navigation button in the Navigation Bar [1]. The Pointcloud Pane [4] is useful for taking 3D measurements, adding annotations and much more.
Automatic View Sync
While using MJ4D, you’ll notice the pane views automatically synchronize with one another.
For example, while panning in the Panoramic Photo Pane, the looking direction updates in both the Pointcloud and Map Panes.
Map Pane
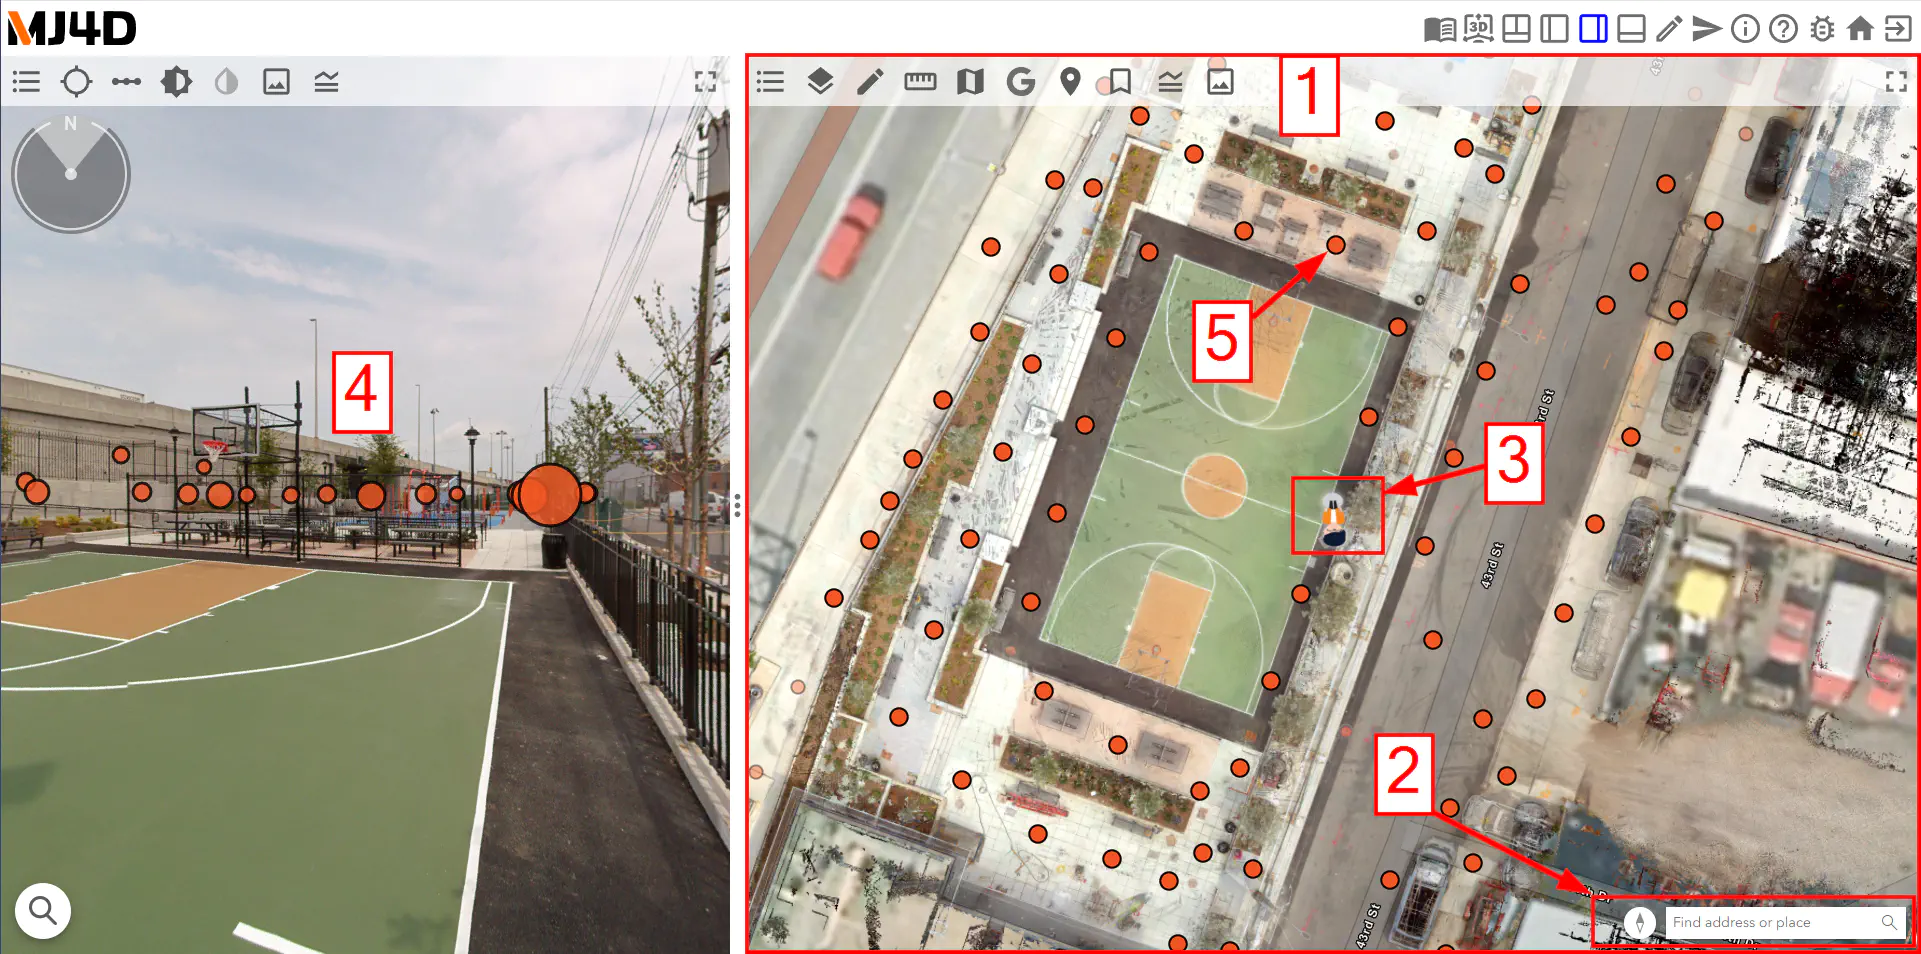
The Map Pane [1] features an interactive web GIS (Geographic Information System) with a basemap and data layers.
The most common way to navigate within MJ4D is with the Map Pane [1]. To move around either pan and zoom with the mouse, or look up an address or place name with the Search Bar [2].
The Map Avatar [3] shows the current location and looking direction reflected in the Panoramic Photo Pane [4].
Click a Panorama Location Point [5] in the map to go to that particular 360° panoramic photo.
Pointcloud Pane & 3D Navigation
The Pointcloud Pane [1] contains LiDAR (Light Detection and Ranging) pointclouds, which are 3D representations of a real-world place captured with a laser scanner and comprised of millions of data points.
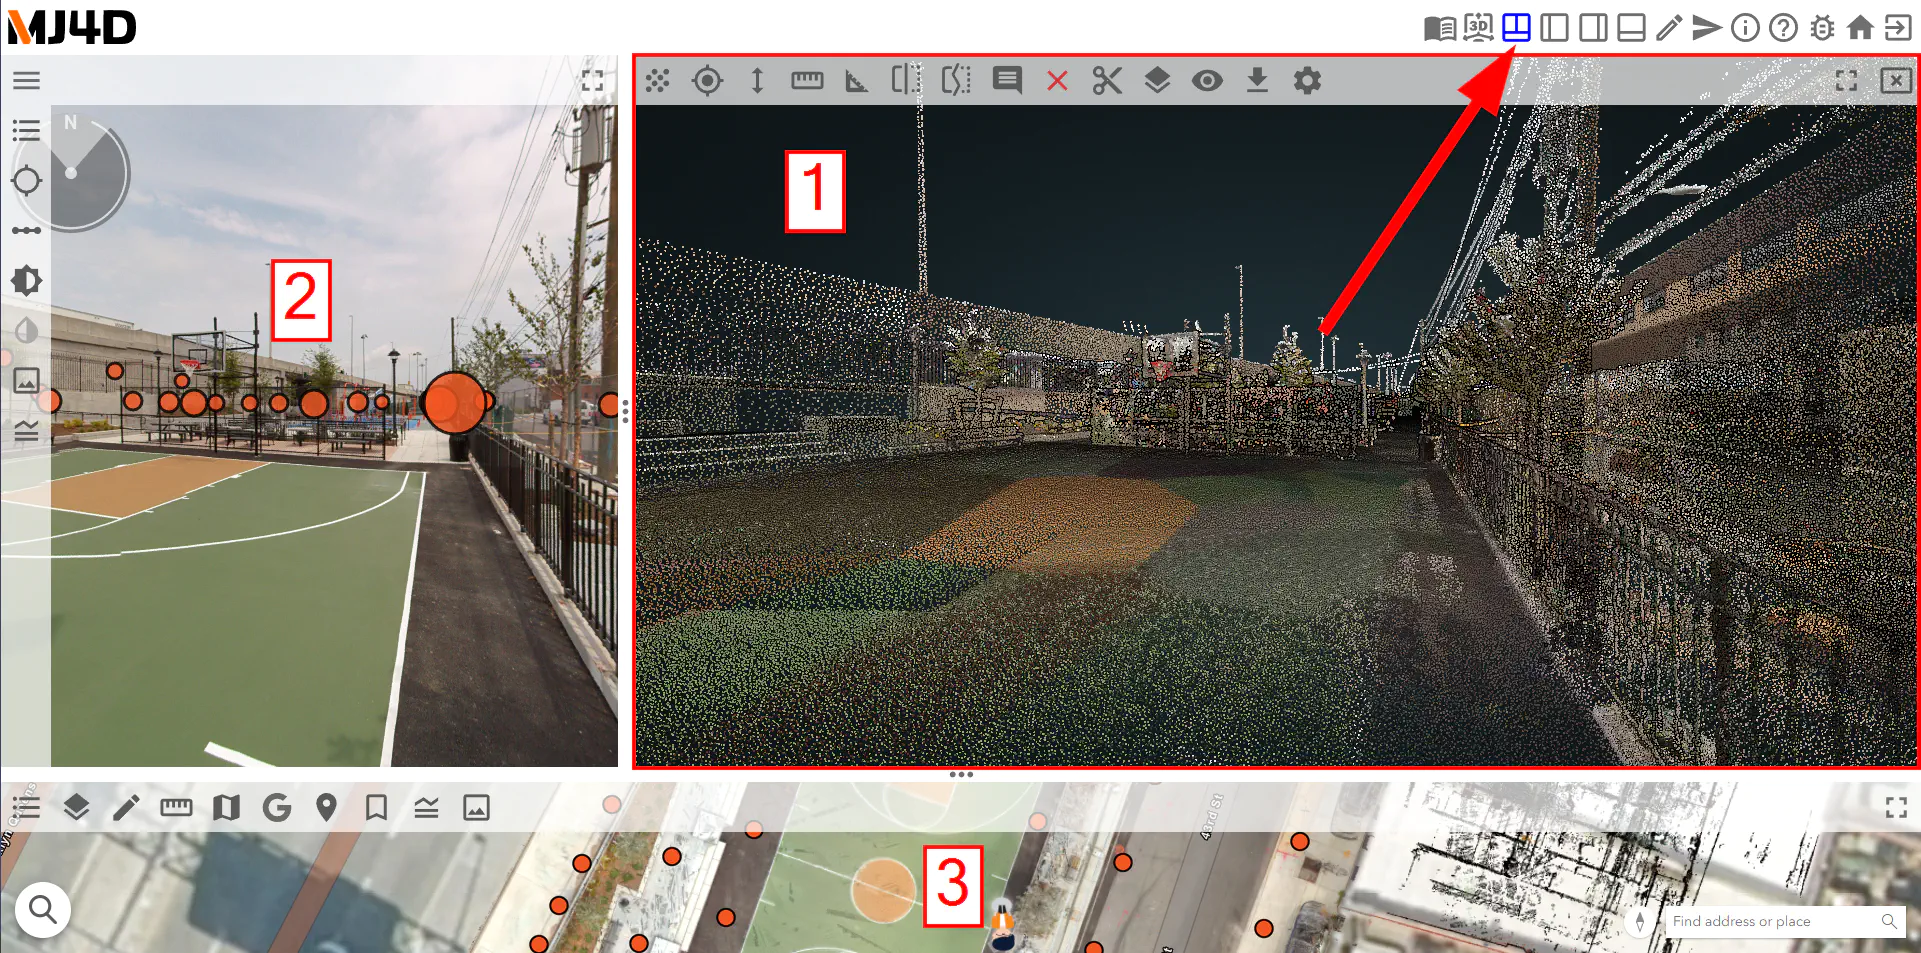
When the three pane view is on, the Pointcloud Pane [1] is viewed alongside the Panoramic Photo Pane [2] and the Map Pane [3]. While in three pane view mode, the point of view stays fixed to the location where the photo was taken. However, it is possible to freely navigate anywhere in the pointcloud.
To enable this navigation mode, click the 3D navigation button in the Navigation Bar [1]. To move around the pointcloud, use the mouse scroll, left-click and right-click. Use the left-click to move the camera smoothly along a flat plane, locking the Z position in place. Right-click and hold a point in the pointcloud while dragging the cursor to rotate around the fixed point. Scroll up to zoom into the point the cursor is hovering over, and scroll down to zoom away from the point. To close the fullscreen Pointcloud Pane, click the exit fullscreen button .
Panoramic Photo Pane
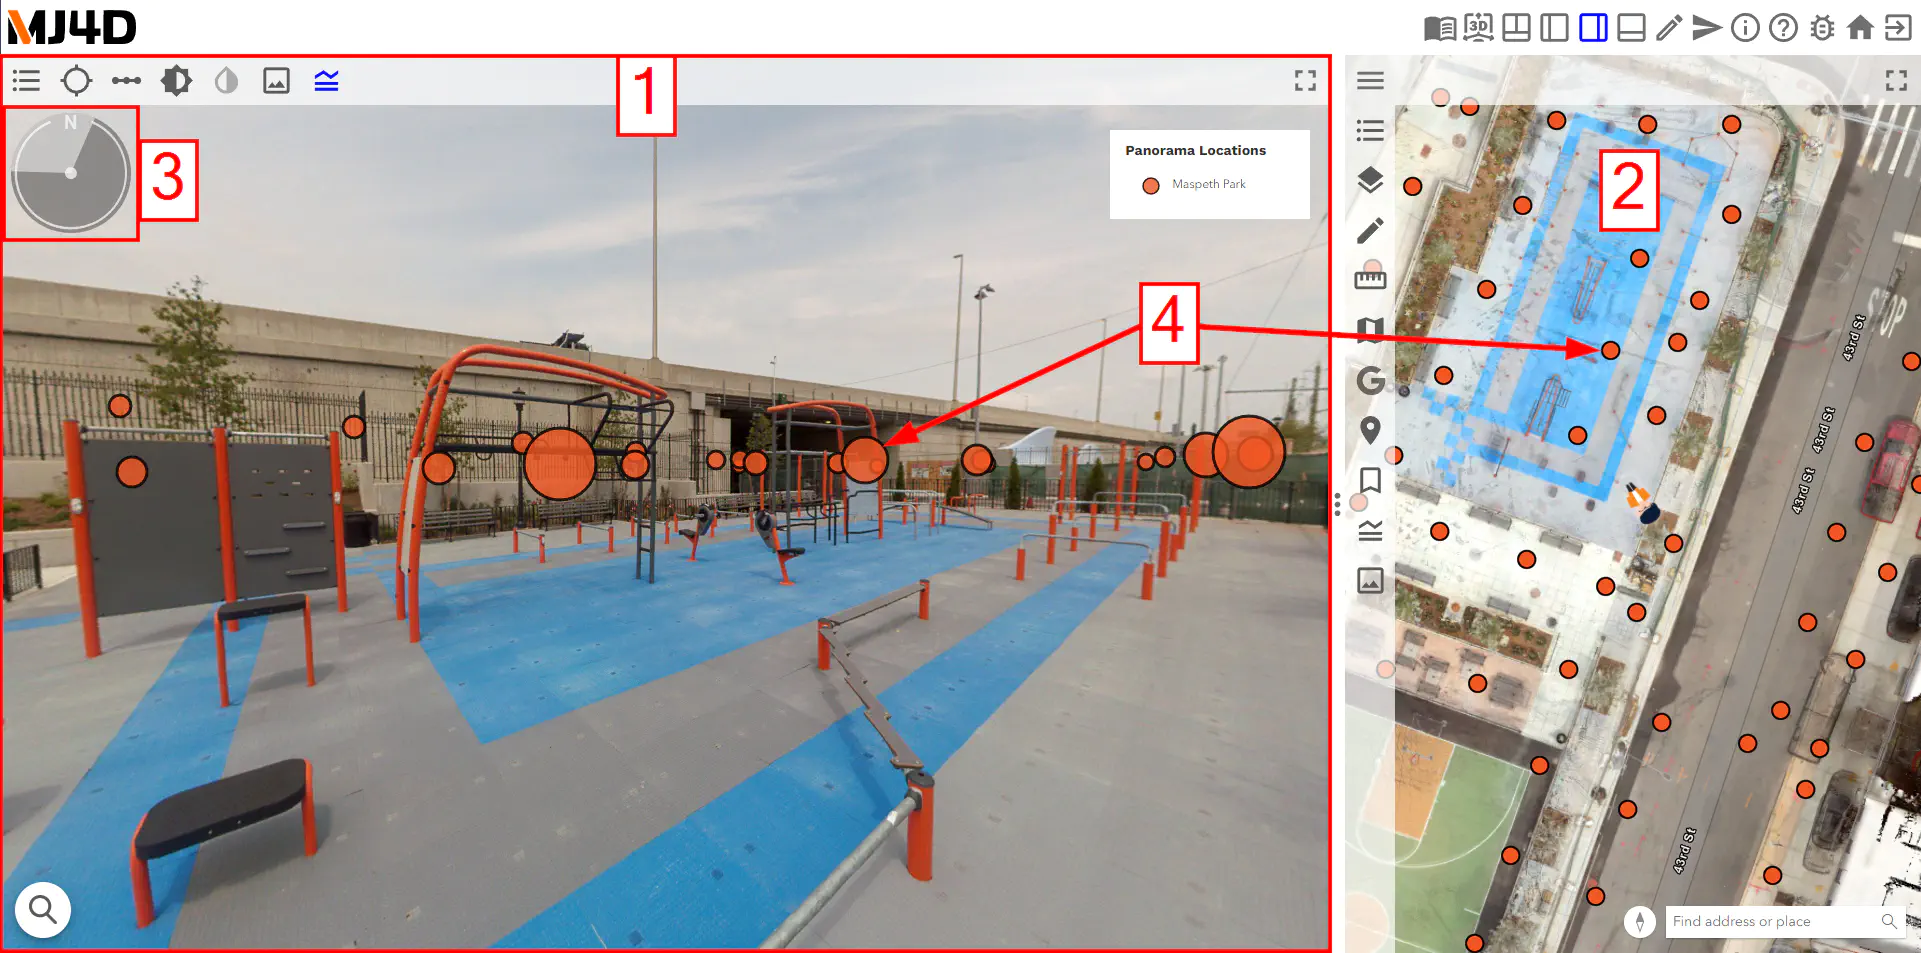
The Panoramic Photo Pane [1] contains a special type of high-resolution photo which offers a full 360° panoramic view from a given vantage point.
Zoom and pan the photo in any direction, and the current looking direction is shown by the Compass [3].
To virtually drive or walk through the scene, click on the Panorama Locations [4]. The semi-transparent orbs in the Panoramic Photo Pane [1] are the same as the points in the Map Pane [2].
Taking Measurements
One of the most common tasks in MJ4D is taking measurements. Measurements can be done in any of the three panes.
Use the Map Pane for taking general 2D distance and area measurements. Use the Panoramic Photo Pane or Pointcloud Pane to take precise 3D measurements.
Workflows for taking measurements in the three panes can be found here:
Measuring in the Panoramic Photo Pane
Measuring in the Pointcloud Pane
What’s Next?
🎉 Congratulations! You’re up and running with MJ4D.
Now that you know the basics, check out the 📙 Feature Reference → for a deeper dive into the MJ4D app panes. Or, see the 📄 Workflows Guide → to learn how to accomplish some common tasks with MJ4D.